
![]()
5300 Digital Picture Frame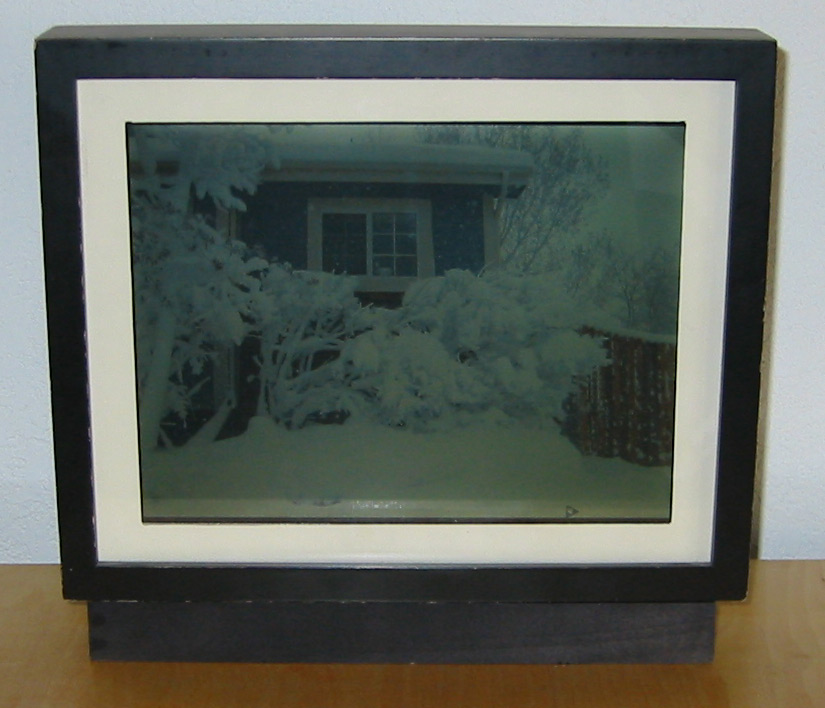
This project was begun in 2003. The article was written to the best of my recollection, but there may be some missing details or seeming inconsistencies as a result of more than three years passing between when this project was begun and when this article was written. It seems like everybody is building their own digital picture
frames these days. There are plenty of standard "tape a laptop
to the backside of a picture frame" mods out there, but there
are also a few real gems of case modifications that really stand
out. However, all of them are pretty standard in how they function:
store pictures on the hard drive, boot into an application for
a slide show, and disassemble the entire device when you want
to make any changes. That's a great solution if you want a pretty
static display of images, but when you want your pictures to change
with the seasons, the months, the weeks, or even daily, that makes
maintenance a nightmare. As I was designing my digital picture
frame, that maintenance nightware was something I really wanted
to avoid. I did so by connecting my digital picture frame to my
in-house wireless network. 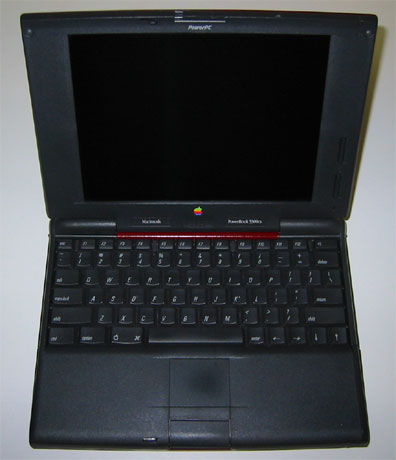
PowerBook 5300s are a dime a dozen these days. With PowerBook G3s of all varieties being in the $100 - $300 price range, 5300s have pretty much bottomed out in price. They can regularly be found for $30 or less. That means that there are plenty of the old PowerBooks being phased out of service, recycled, dropped in the dumpster, and yes, even a few have been set on fire (deliberately). I picked up my 5300c for about $30 a few years ago. It had been sitting on the shelf doing not much for quite a while. One day, while surfing AppleFritter, I saw a page detailing how someone had modified a an old PowerBook to work as a digital picture frame. It seemed like a brilliant idea, and at the time, not one that many people had implemented (of course, over the next 18 months, at least two more picture frames turned up on AF). The 5300c on my shelf seemed like the perfect candidate for making a similar digital picture frame. With a bright active matrix display, relatively compact size, and largish screen, it would be a good platform for displaying pictures. Plus, it has a PC Card slots allowing for a wide variety of configurations and connectivity.
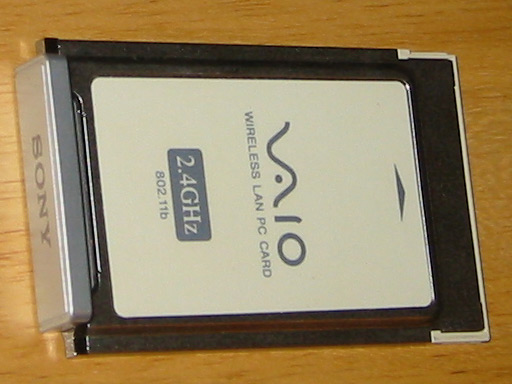
The last piece of hardware I needed was some sort of frame. Taking a trip to Target with the rough dimensions of my 5300 in hand, I found a shadow box that was just large enough to accept the display and motherboard without requiring any extra parts glued to the backside of the frame. The slide show software choice was (and still is) obvious: There's really only one decent image viewer for Mac OS versions prior to OS X. That software is JPEGView. If you don't have JPEGView already, you don't know what you are missing. It's free, and it does one thing (okay, two) excellently: It displays pictures on your screen. It also allows you to configure a slide show that displays any images on a black screen with a user-definable delay between image updates (and a variety of other configurable parameters). What wasn't immediately obvious was what operating system I should be using. The original plan was to use OS 8.1 (given its relatively low resource requirements as compared to OS 9) as the boot OS to enable a relatively modern implementation of AppleShare and OpenTransport for file sharing. Since this was going to be wireless, and since my wireless base station doesn't route EtherTalk packets across the wireless transceiver, I would also need a copy of ShareWay IP Personal to set up AppleTalk-over-IP (commonly misnomered as AppleShare IP) sharing of my picture frame's boot volume. Finally, I'd need drivers for the wireless card. Again, that choice was obvious: Only the WaveLAN 5.x drivers were available to me at the time. At first, this particular software setup worked fairly well. But as I would later discover, this software combination was not the optimal solution for my needs. Being fairly familiar with 5300s, I already knew how to completely gut my PowerBook, and I knew that there was enough play in the video ribbon cable to allow me to rotate the screen a full 180 degrees so that the motherboard would now be on the back of the screen. So I proceeded to completely strip down the 5300. I removed every screw and every piece of plastic. Dry fitting it all in the shadow box, I found that the original matting would not allow the full extent of the display to show through. I powered up the gutted 5300c with the matting over the now naked screen and traced the outline of the backlight on the matting. I then trimmed the backlight with a razor to match the outline of the visible portions of the LCD. I placed all the parts back into the shadow box and saw that there wouldn't quite be room for everything to fit with the normal back of the shadow box in place. No problem, I could easily redesign that portion of the shadow box. What was really interesting was that there would be no room for a hard drive regardless of how I set up the innards, and there would also be no way for a normal WaveLAN card to fit inside the frame without carving a large slot for the antenna to stick out the side of the frame. Needless to say, I wasn't happy with the idea of a large tile antenna sticking out the side of my picture frame. I thought that there must be a card with a smaller antenna out there somewhere, so I did some research.
Along the way, I found that the ORiNOCO 7.2 drivers would work with this card perfectly. Unfortunately, they also require OS 8.6 or better. Given that I had plenty of "disk space" and RAM and that I wanted to keep things simple, I decided to just upgrade my OS to 8.6 and use the ORiNOCO 7.2 drivers with the card. No "hacks" were required to make it all work together. So now that I had all the hardware I would need, I could construct the picture frame. The shadow box I had choosen turned out to be just perfect. The 5300c's screen was just about 1/4" shorter than the inside of the box, so it would fit nicely. To keep it from moving around, I simply applied some electrical tape to secure the screen to the matting and a few drops of hot-glue in the corners. The logic board, PMU, and heat sink all fit in nicely behind it so that when the back of the shadow box was in place, the pressure of all the components being gently squeezed is enough to hold it all in together. Of course, having it all encased in a picture frame might be nice if you just want to stare a black screen for hours on end. I wanted that screen lit up, and that would require some way to power the system. Fortunately, my shadow box came with a smaller balsa wood insert to help squeeze the matting against the front glass. I was originally going to discard this balsa, but then I realized I could use it to build a stand. I cut it in two places forming a long "E" (of course without a center bar - more like a "C" with right angles) and hot glued it to the bottom of the shadow box as a stand. The stand would serve two purposes: It would elevate the shadow box so that I would have access to the ports at the bottom of the frame, and it would hide any cables coming out of the bottom of the frame (think "G4 Cube"). Finally, armed with a sharp knife, small saw, and a drill, I cut out portions of the frame where the ports on the motherboard lined up so I could connect to the ADB port and to the power jack. Using the drill, I also drilled a few small "vent" holes on the bottom of the shadow box to allow some air convection up through the case to keep the CPU relatively cool. 5300s have a terrible reputation for being hot. In regular operation, however, I've found my 5300s to be the coolest laptops I have. They are far cooler than the Wallstreet and cooler even than the 3400c. In fact, the CPU probably runs on average at about 80-90F (much cooler than the 120F+ of some G3s). Still, I was a little concerned about overheating, so I decided to perform a little experiment: I ran the picture frame all buttoned up (minus the WiFi card) for several days WITH NO HEATSINK! The 5300 is dirt cheap, so losing a motherboard was hardly a worry. I was very surprised by the results: The system was still running flawlessly nearly a week later! (Looking back on it, this was probably an incredibly stupid thing to do. Buttoned up in a wooden case, this was a fire hazard. Please don't try this with your own system!) With the heatsink in place, it would have no trouble at all...
Unfortunately, the system required a keyboard to be plugged in to do some tasks like restart the PowerBook, quit and launch JPEGView, etc. This proved to be fairly annoying, and the keyboard was an aesthetic drawback. After a few years of operating the 5300 Digital Picture Frame in that configuration, I had identified some flaws and drawbacks to the design. First and foremost was the nearly ubiquitous need to use a keyboard for any sort of interaction with the PowerBook. Sure, I could add pictures via AppleTalk, but JPEGView wouldn't rescan the folder until the slide show had been restarted. So even just adding new pictures required using a keyboard. Another drawback was that occaisionally the PowerBook would lose it's connection to the remote AppleShare mount and throw up an error on the display (then requiring the keyboard to get the Mac back under control). An earlier idea of being able to use AppleEvents and Program Linking to control the picture frame had petered out. I revisited the idea in early 2006, and did some investigation. I could write an AppleScript that would run from the Startup Items folder and accept AppleEvents from other Macs to control how JPEGView (and the underlying Mac) would operate. There was a catch, however. My wireless access point doesn't route AppleTalk packets across the wireless transceiver. I had been getting around that problem by using ShareWay IP Personal to enable AppleTalk-over-IP file sharing. My copy of ShareWay IP Personal, however, would not route AppleEvents over IP. This problem could be overcome with Mac OS 9. Mac OS 9 includes an Apple-licensed copy of ShareWay IP Personal to enable File Sharing over IP and Program Linking over IP. I installed all the software on a full test 5300cs, and then built an AppleScript to control the slide show. I built another AppleScript on a 2nd Mac to connect to the first AppleScript. Everything worked as designed: Pushing a button on any Mac on my network could result in the picture frame rebooting, quiting JPEGView, or any other automatable task I wanted it to perform. So the final setup is really pretty sophisticated.
The picture frame runs OS 9. In the OS 9 Startup Items folder
is my AppleScript Daemon. The AppleScript launches JPEGView, and
it tells JPEGView to start a slide show. The AppleScript can do
several other tasks, too. It can set the sound volume of the picture
frame, it can shut down the picture frame, it can restart the
picture frame, and it can do any other task I program it to perform.
And I can even update the AppleScript by mounting the picture
frame's hard drive on another Mac, moving the AppleScript from
the startup items folder, and replacing it with another AppleScript. All-in-all, I'm quite pleased with the results. The picture frame is visually striking with a somewhat antique distressed look, and the AppleScripts are easy to use to configure the slide show. The 5300 is completely silent, and with a 10-30 second refresh rate (also configurable), the pictures are never stale. One drawback still remains. I haven't
found a way for a Mac running OS X to display the same "choose
application" dialog as on Mac OS 9 that allows a user to
connect to the applications on any OS 9 (or earlier) Mac on the
same network. Without that feature, the controlling AppleScript
(run from a remote Mac, not on the picture frame) must either
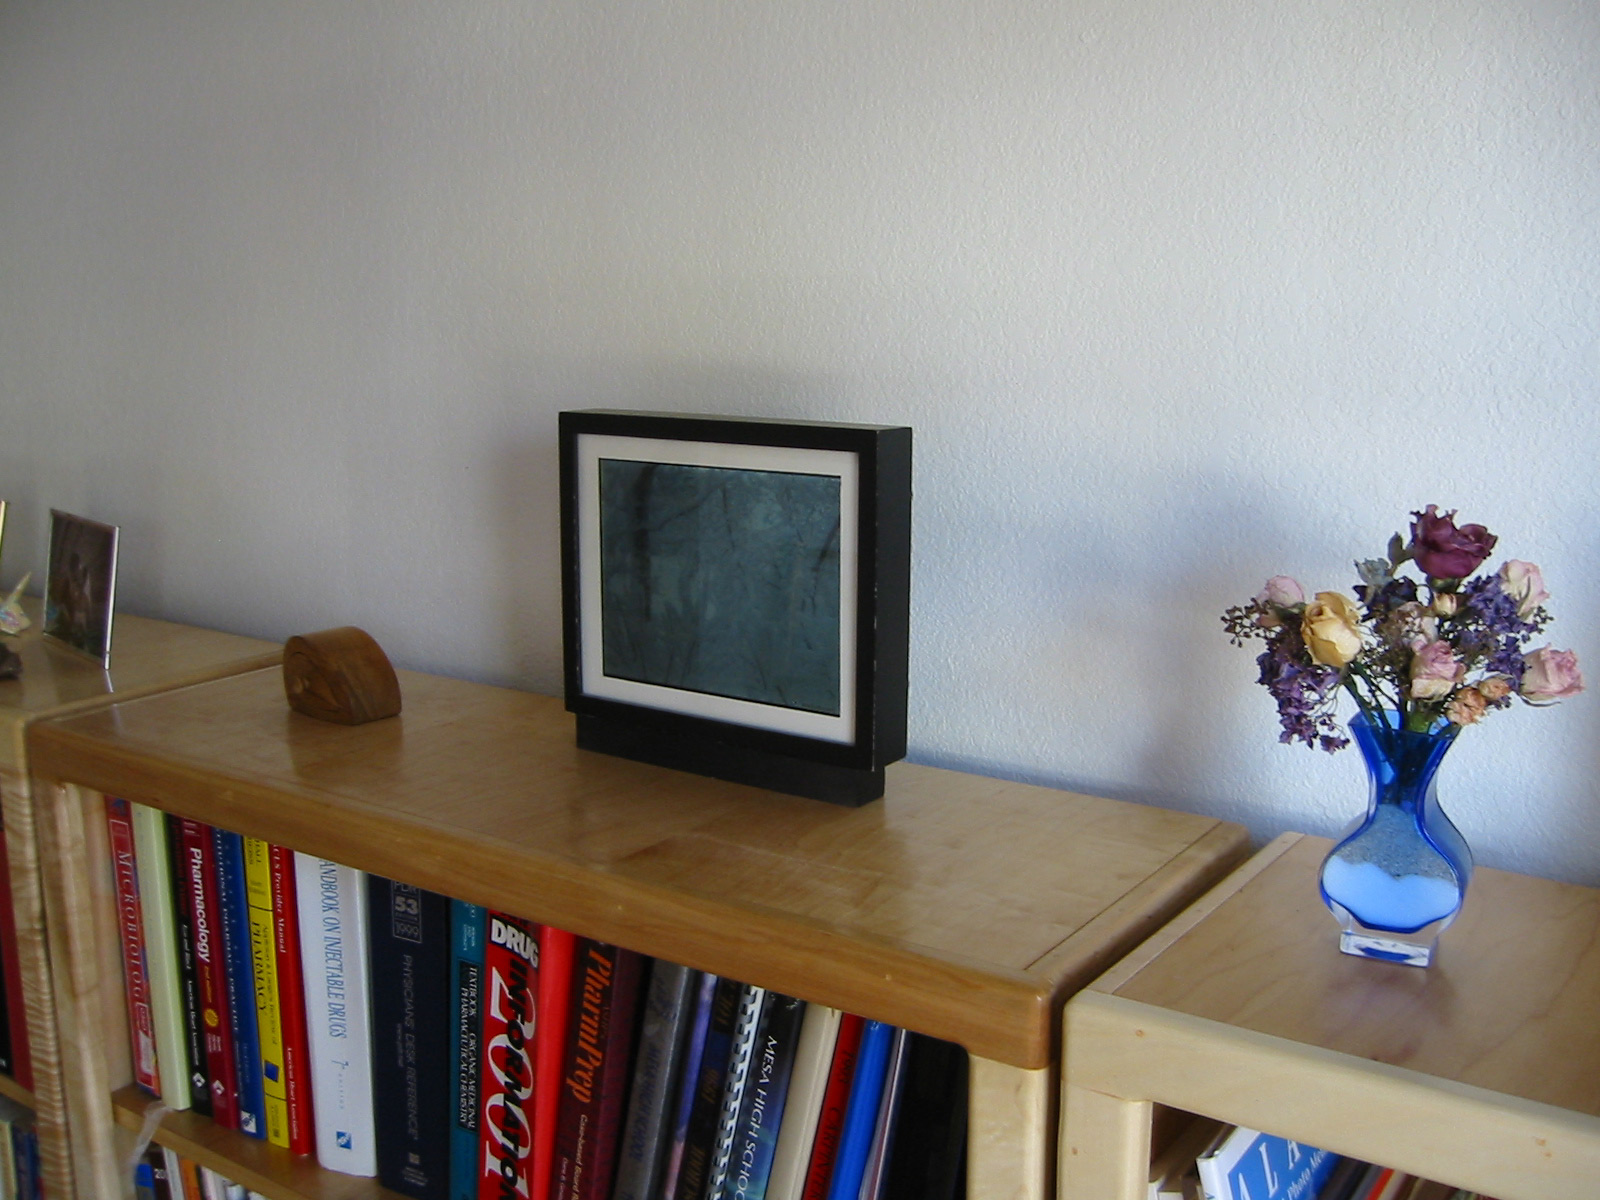
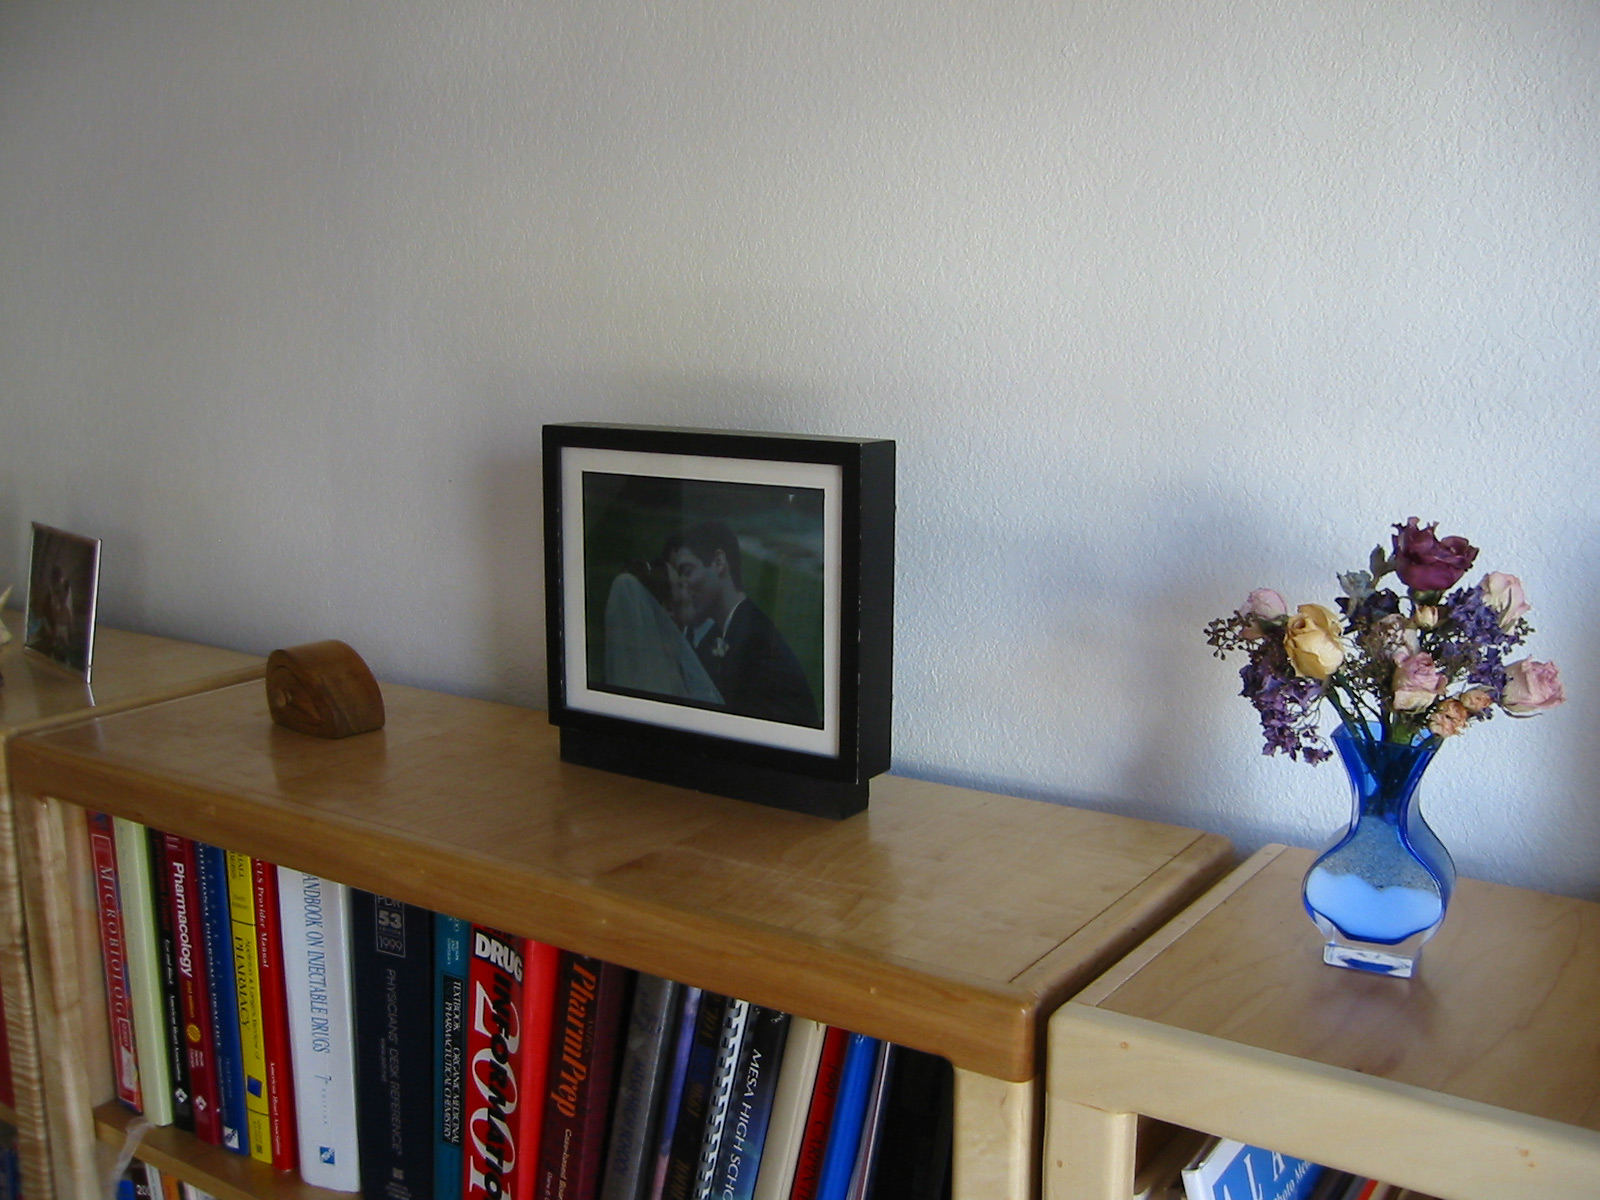
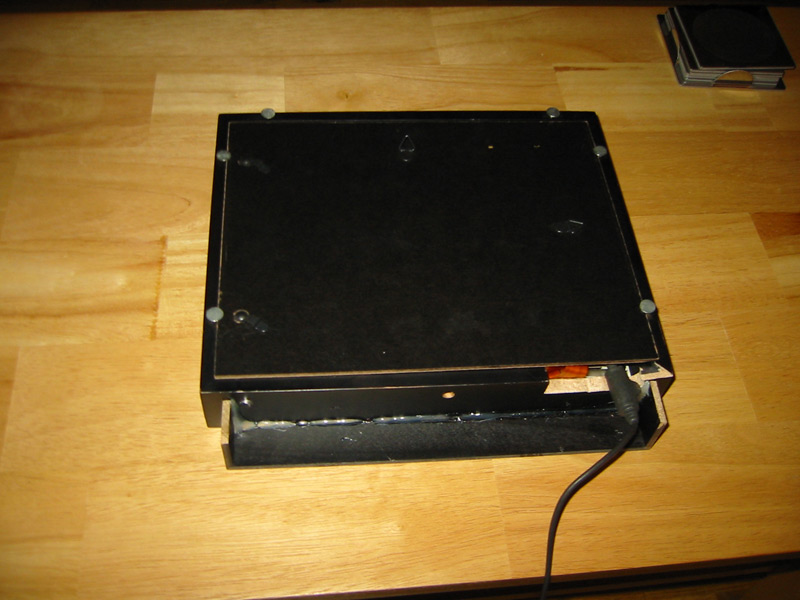
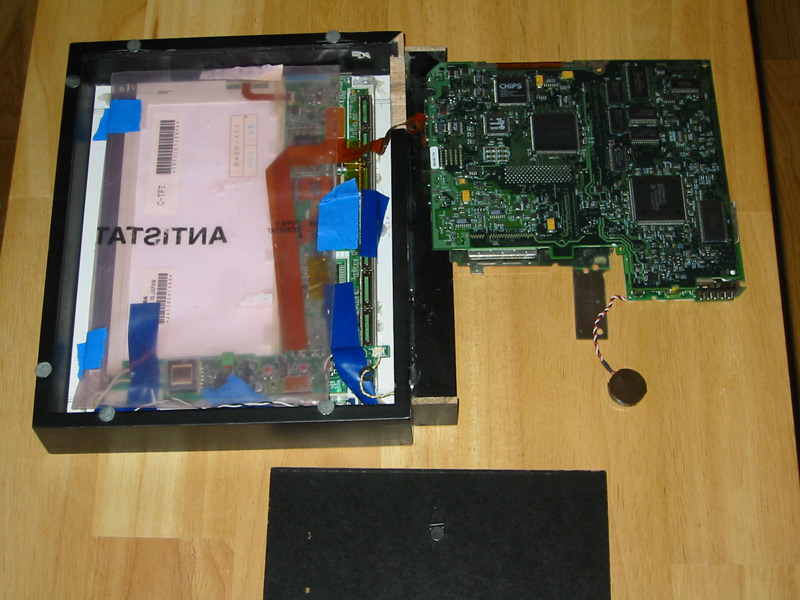
be run in Classic or natively in OS 9 or earlier. Here are a handful of pictures of the digital picture frame in various states of operation and disassembly.
I've decided to make my AppleScripts available for download. If you want to do something similar with your picture frame, maybe they'll come in handy. I'm no AppleScript genius, but I can usually find my way around. Please be kind when reviewing the code! Digital Picture Frame Daemon. Save this script as a compiled application in the picture frame's Startup Items folder. Make sure you turn on Program Linking in the File Sharing control panel, and make sure each user you want to allow access can connect using Program Linking. Digital Picture Frame Control. Run this script from any other Mac to communicate with the Digital Picture Frame Daemon. Pre-programmed choices only allow you to restart the picture frame, shut down the picture frame, quit JPEGView, and launch JPEGView, but you could add your own. |

![]()
Content & Design ©
AlkSoft, 2004.